Sunday, November 30, 2014

The Chevron Pattern

When I was in my senior year of high school; I started making friendship bracelets as a hobby. I made some for all of my friends, and they loved them! As I continued making them, I found out how to make all kinds of beautiful patterns and styles. My favorite pattern to make is the chevron. Below, I put a step by step guide so that you can create one for yourself or for your friends. Let's get started and have some fun!


Here I took four strings: magenta, navy blue, green, and white. Each string is 50 inches long, and I took the ends together to fold the strings in half to make eight strings. Then I took the top and I tied it into a loop.


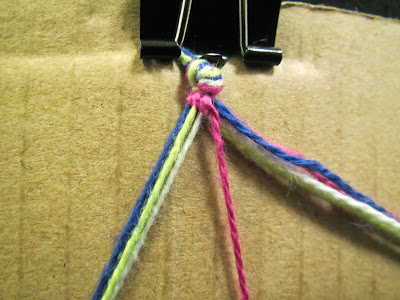
Now I spread out all eight strings to make it easier to see each one.


Now we are going to do a forward knot, starting from the left with the magenta string.


First, we put the magenta string over and under the navy blue string, and back over the magenta then pull tightly. Do this twice on each string, starting with the navy blue so that the magenta string ends up in the middle. This is the forward knot.


Now leave the magenta string in the middle so now we can start from the right side.


Now for the right side we are going to make backward knots instead of forward knots. Take the magenta string over the navy blue string.


Put the magenta string over and under the navy blue string, and back over the magenta. Pull tightly and do the same thing on the next three strings going from right to left this time.


This is how the strings are going to look when you get to the middle.


Now tie the middle strings together twice (I usually use two forward knots to tie the middle together.) 


Now we do the same thing with the next row. Starting from the left we take the navy blue string and make a forward knot onto the green string. Do this twice on the next three strings until you get to the middle. (See the picture below on how to do a forward knot.)


Then go to the right side and do the same thing except this time you are going to be doing backward knots on the next three strings from the right. (See the picture below on how to do a backward knot.)


Continue to add more rows until the bracelet is as long as you desire.


To finish the ends, I usually braid them into a four part braid and tie them at the ends.

Here is a close up of the end of the bracelet with the four string braid. Then I cut off some of the excess string, and it is done!


1 comment:

  1. Thank you for providing this information. This is a very comprehensive blog. Thank you for your time and dedication! Please continue to share such blogs gold necklace for men

    ReplyDelete